SKÅPA, a parametric 3D printing app like an IKEA manual
March 24, 2025
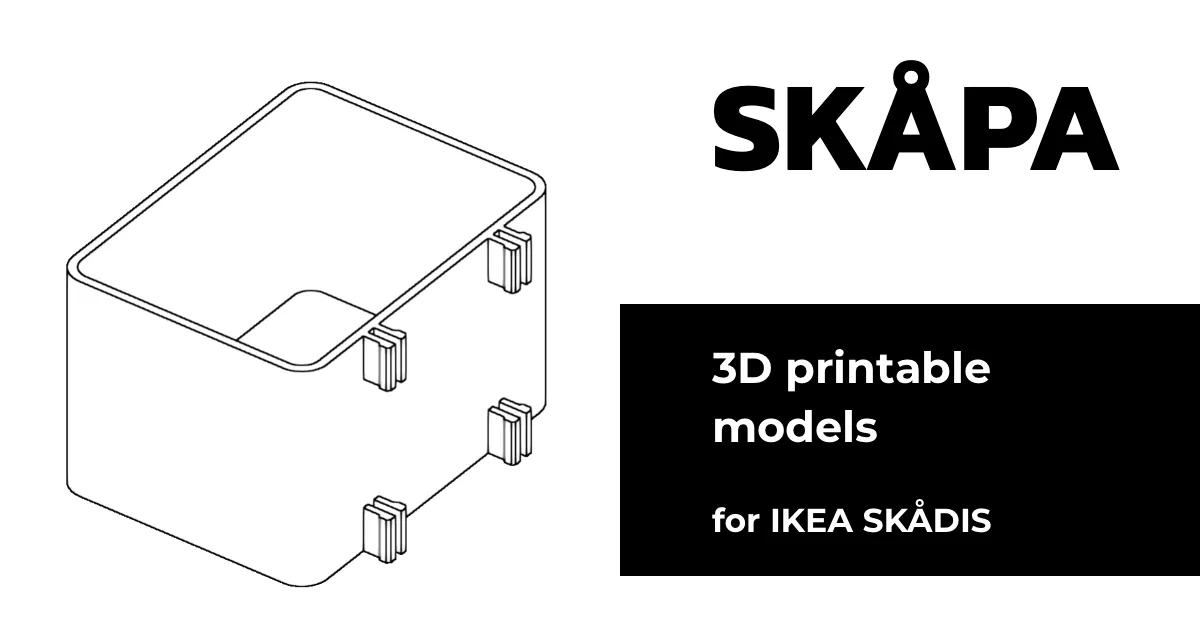
This is a mini-release for Skapa, an app I made for generating 3D-printable models for IKEA Skadis pegboards. This post goes through some of the UI & UX decisions and gives an overview of the tech used for model generation and rendering (with Three.js).
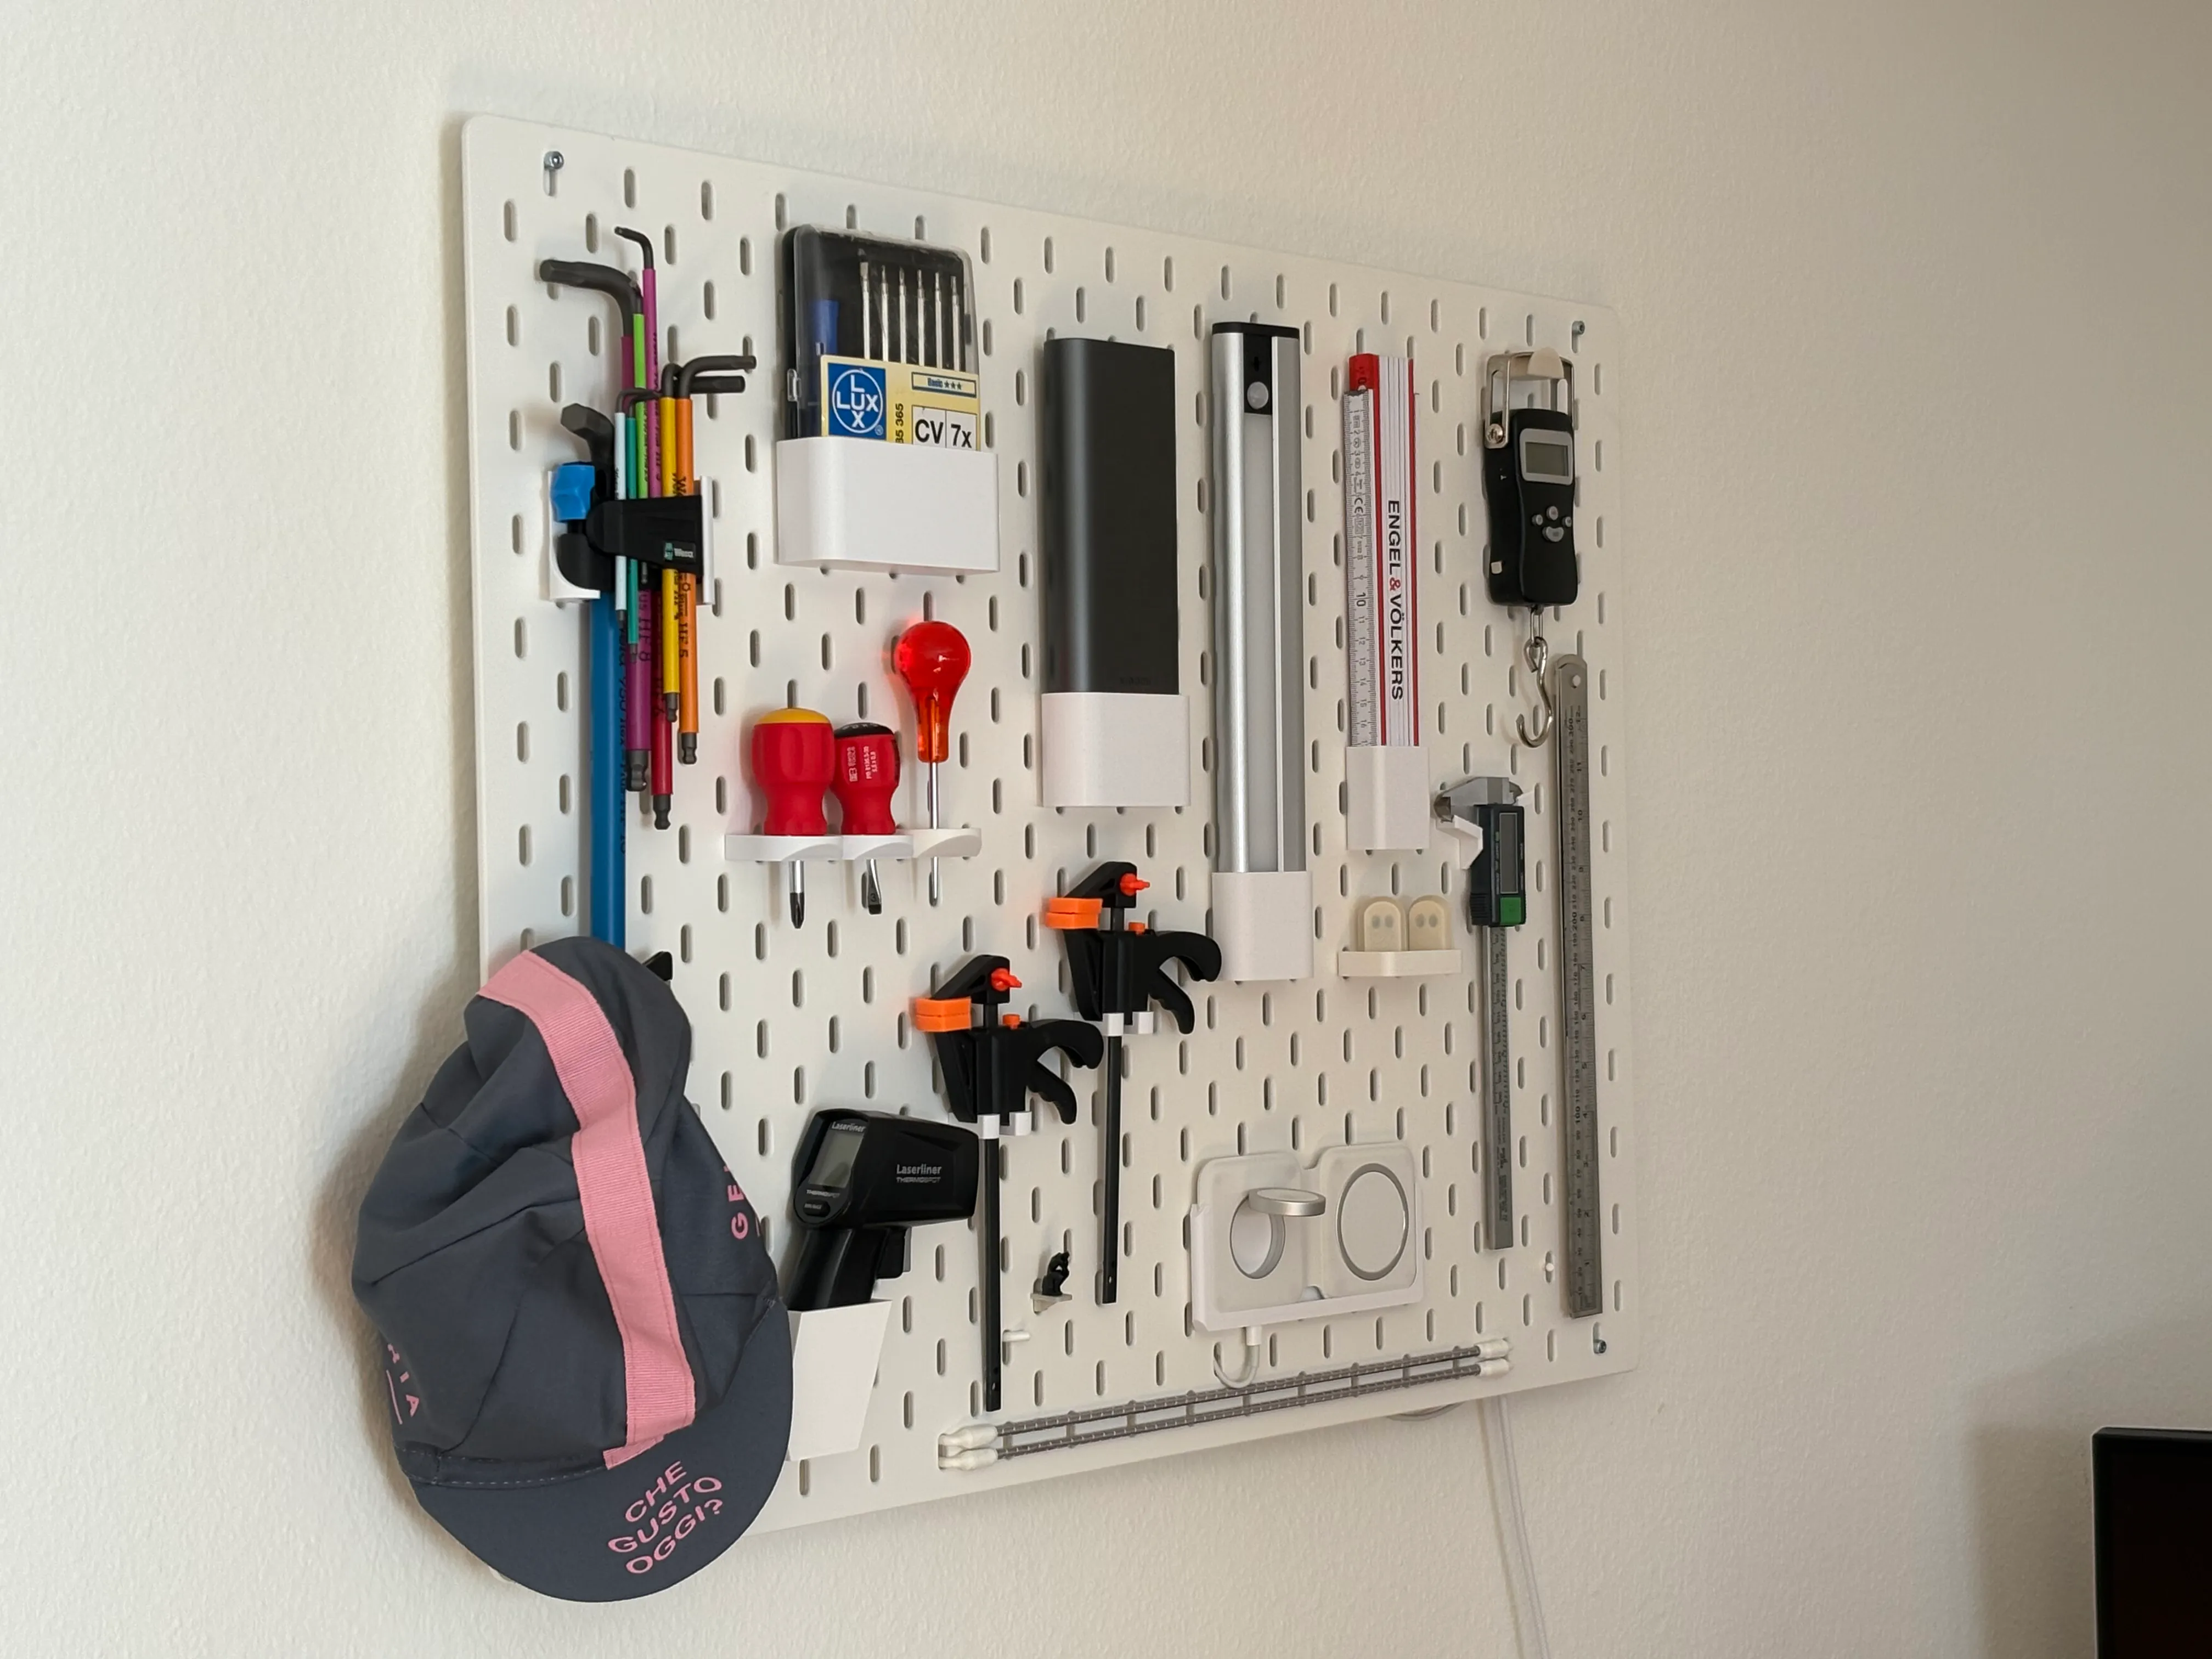
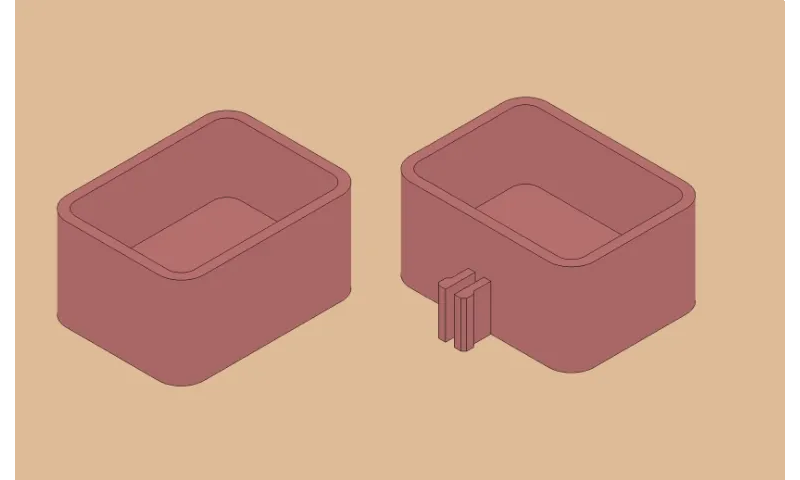
My Skadis board at home
First, let's clarify. Skadis (skådis) is IKEA's pegboard system, allowing different kinds of boxes and accessories to be mounted on the wall. Skapa (skåpa) is how I named my app, and comes from the Swedish word for "create" or "make" (or so I was led to believe).
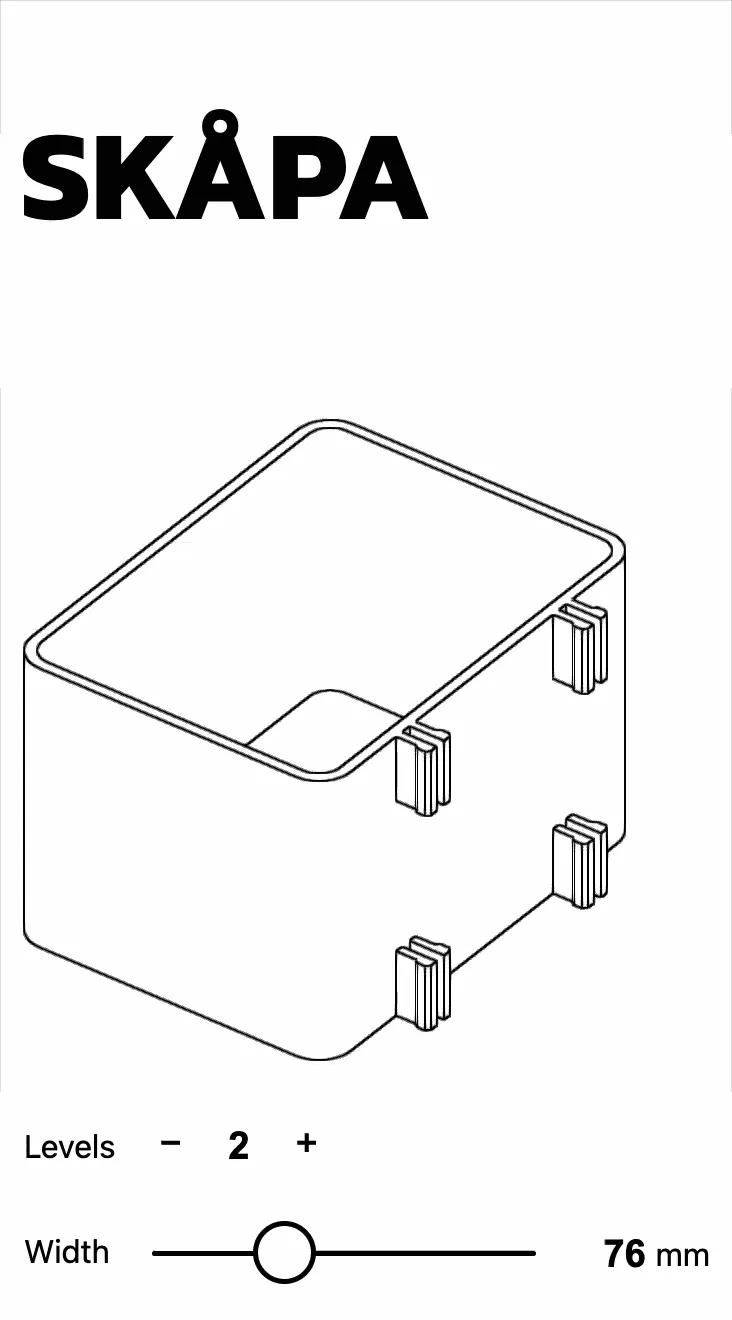
With Skapa you can generate custom boxes for IKEA Skadis. The boxes can be downloaded and 3D-printed. The app is very opinionated and I reserve the right to break anything at any time! It's a side project I've been playing with on & off for a few months -- and also an excuse to learn more about 3D graphics.
To use it, head over to skapa.build, specify the dimensions (width, height & depth) and click the download button. Open the downloaded file in your slicer of choice (PrusaSlicer team here) and print. Voila!
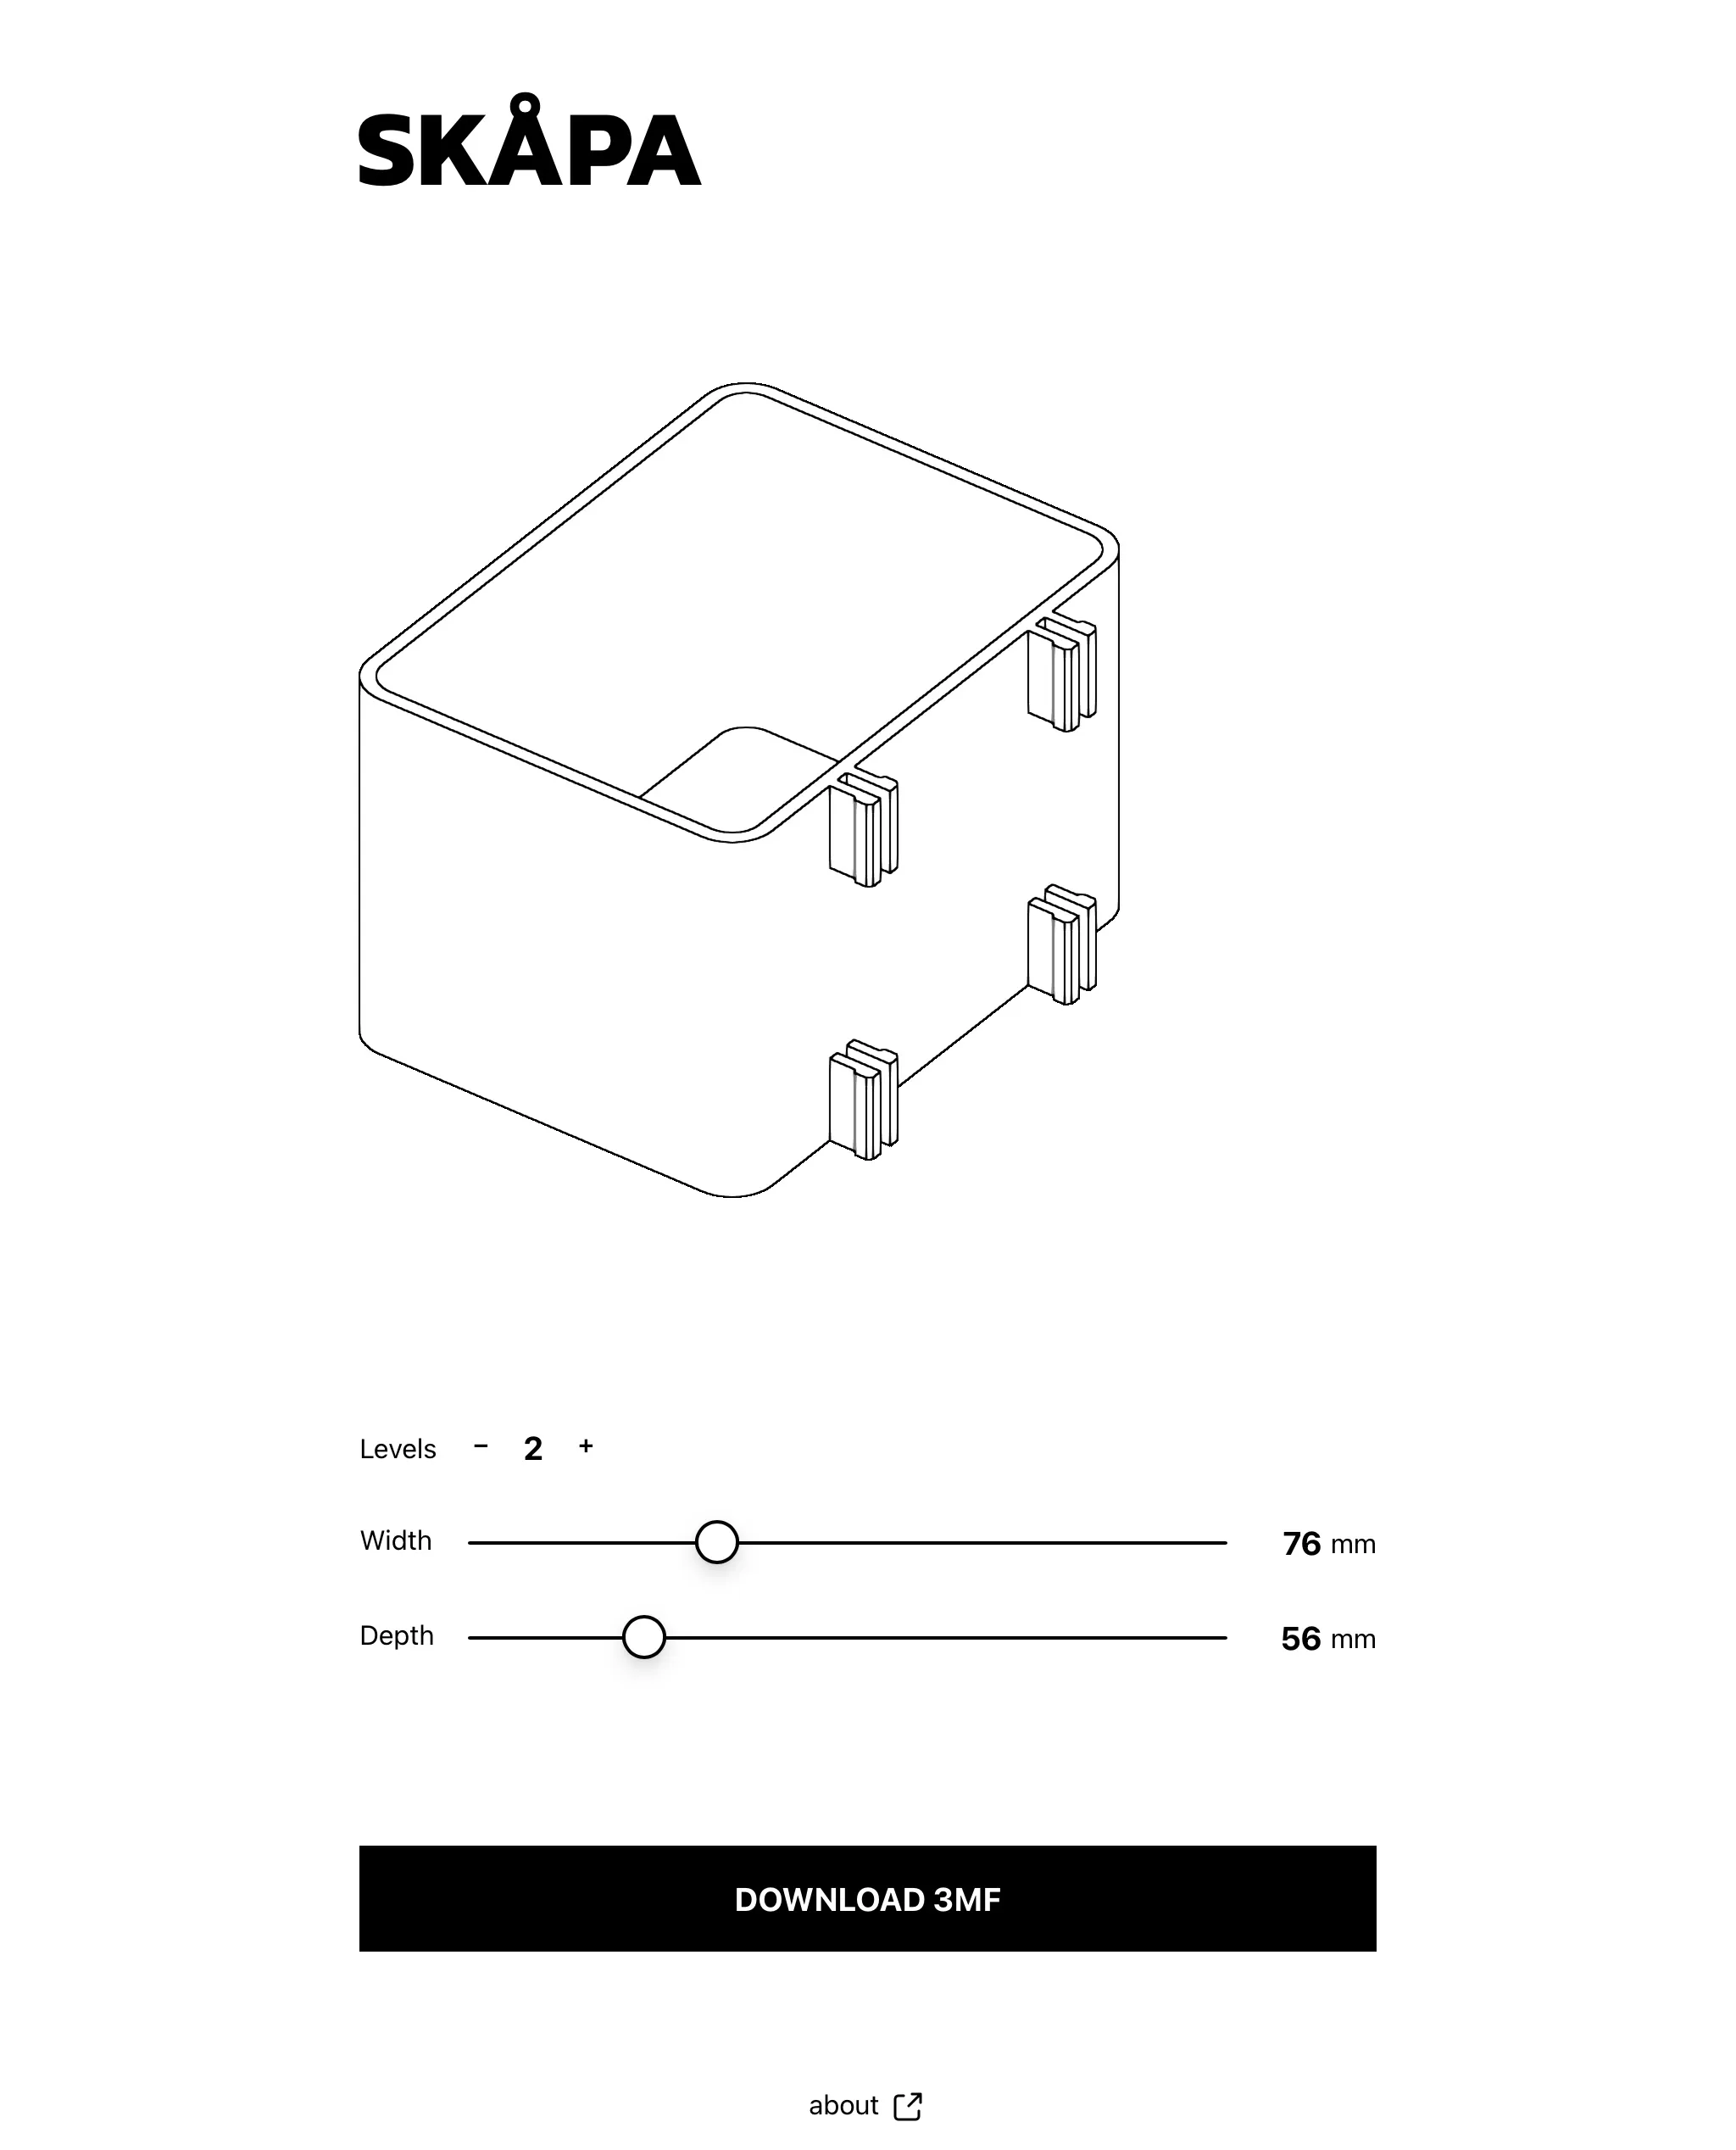
The user interface of https://skapa.build
The code is on GitHub and there is also a Printables entry you can check out (and star).
I'll briefly describe the interface (and some of the "thinking" behind it), then talk about the tech that makes it possible, and then briefly touch on where I'll try to take the project.
Nu kör vi! (let's go!)
UI/UX considerations
NoteBig disclaimer: This is a side project where I decided to explore every possible rabbit hole and allowed myself to obsess over potentially irrelevant details. I've been learning a ton in the process. If something doesn't look right, let me know!
The base idea (and hopefully most obvious design choice) was to make the app look like an IKEA manual. This was done by sticking to black and white, using big blocky letters with an Å, and showing strong, black outlines (more on how this is achieved later).
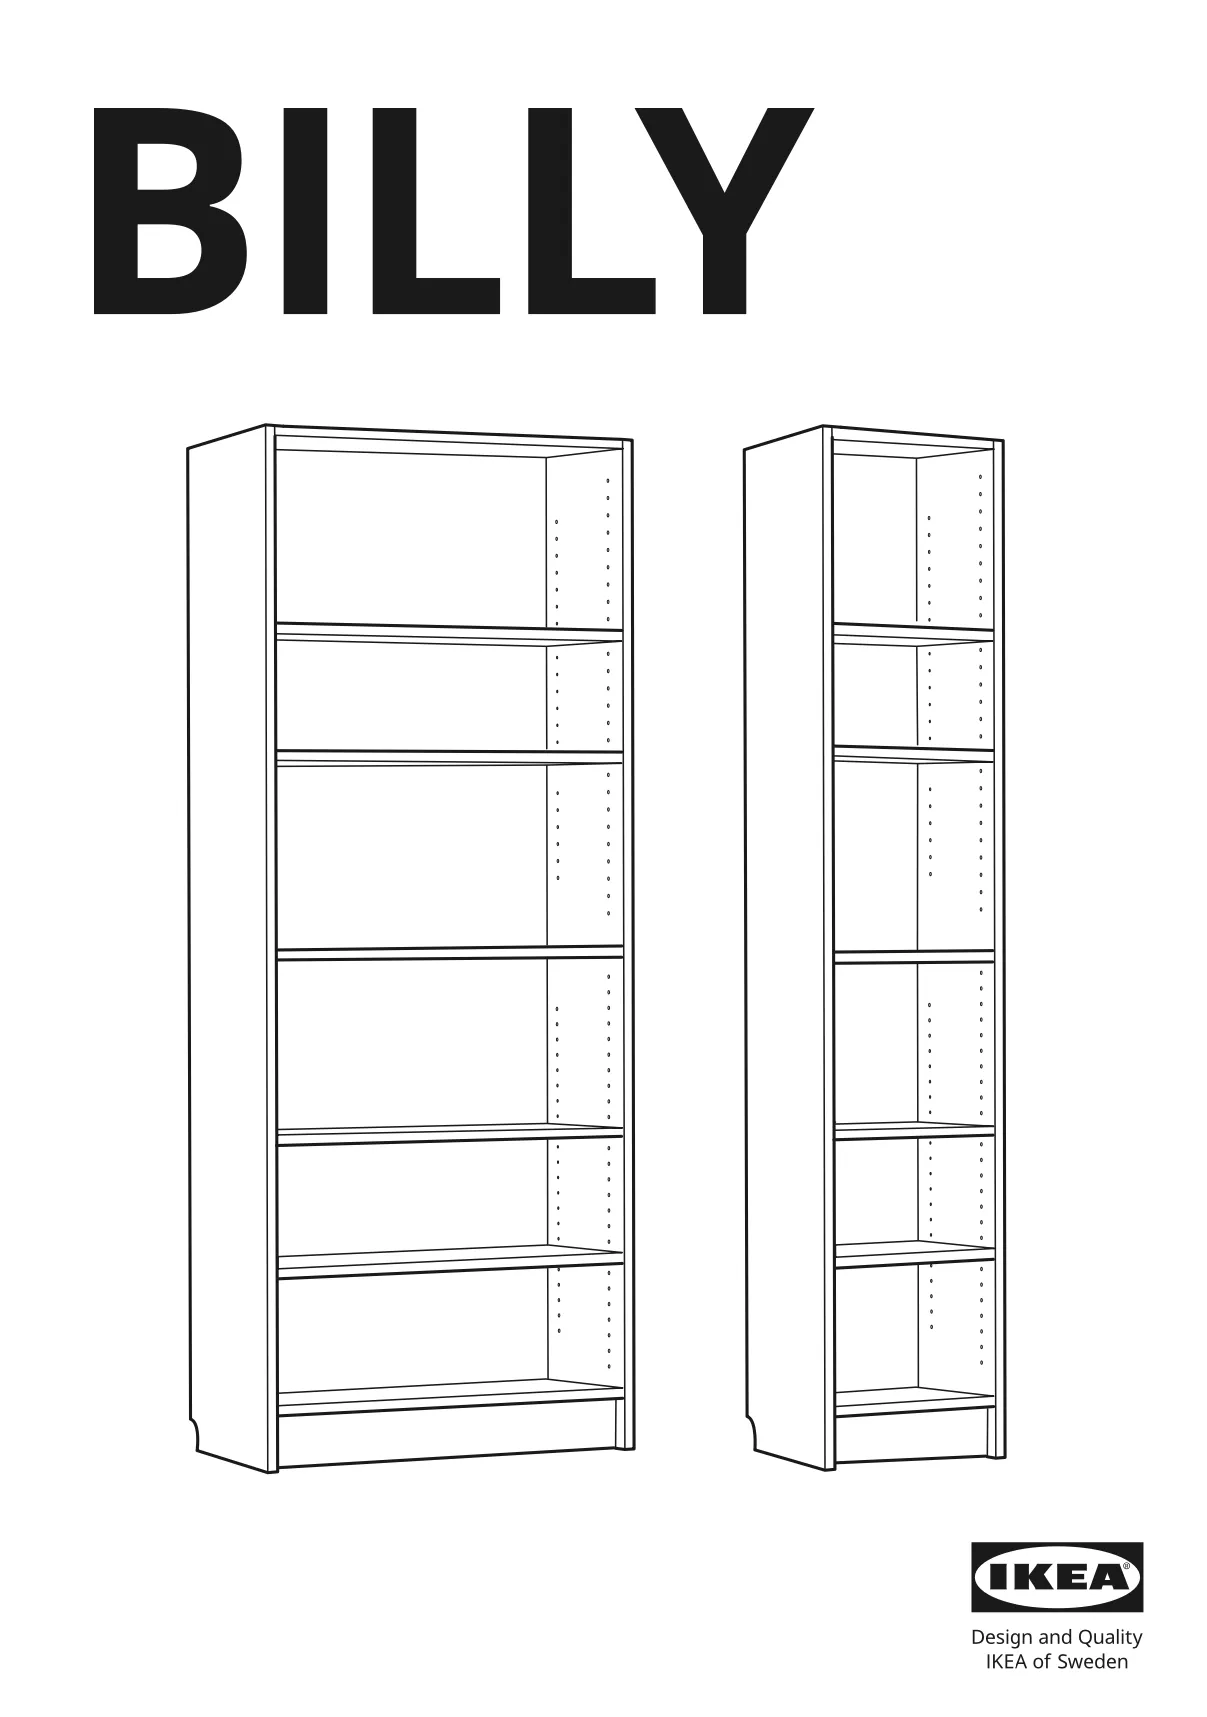
The first page of an IKEA Billy shelf manual
There are a couple of notable differences between Skapa and an actual IKEA manual. First, the app is not paper. Then, the font is not the IKEA font (IKEA Sans) but "Kanit", which is about as far as I'll go to try and avoid being sued (IKEA, do reach out if you want to partner though). Another big visual difference is that IKEA uses perspective drawings (at least on the first page of their manuals) whereas Skapa uses orthographic projection (I just like it more).
Another goal was to have an interface as minimal as possible, so I just spent a lot of time removing buttons and features from the original implementation.
The evolution of the UI over time
Camera Controls
At some point, someone I showed the app said "So cool! Is that an SVG?". It's terribly frustrating to hear someone ask which 2D graphics format you're using when you poured hours into making a 3D rendering pipeline. So I decided to make sure the user could interact with the model a bit to see it was -- actually -- 3D. I wanted to avoid full control over the model (no zooming in/out, panning camera, etc). I find those sorts of controls confusing at best, dizzying at worst.
I settled on simple, vertical rotation when the user drags the part, with the part snapping between two different orientations (try it here) as well as the part rotating 180 degrees (π rads, for those in the know) when clicked.
This surfaced some issues on mobile, where the part can take up most of the real estate; by capturing the mouse & touch events to rotate the part, it sometimes became impossible to scroll the page up and down because the "click" would always land on the canvas element (where the part is rendered) and be captured by the rotation "gesture"!
The workaround here was to only capture events if they landed on the part itself, but not if the event was inside the canvas but not on the part. So satisfying.
Satisfying camera controls
Behind the scenes with manifold-3d, Three.js and shaders
There were three major technical challenges: how to generate the model, how to render the model, and how to add the outlines.
The model generation is done with the manifold library. It is a C++ library compiled to Wasm which can be used from the browser (Skapa runs 100% client-side). The manifold library is also published on npm. The nice thing is that everything happens in the browser and Skapa can be distributed as a Single-Page Application.
Here's some code that uses manifold to create the box base, i.e. the Skapa part without the clips:
// The box (without clips) with origin in the middle of the bottom face
export async function base(
height: number,
width: number,
depth: number,
radius: number,
wall: number,
bottom: number,
): Promise<Manifold> {
const innerRadius = Math.max(0, radius - wall);
const outer = (await roundedRectangle([width, depth], radius)).extrude(
height,
);
const innerNeg = (
await roundedRectangle([width - 2 * wall, depth - 2 * wall], innerRadius)
)
.extrude(height - bottom)
.translate([0, 0, bottom]);
return outer.subtract(innerNeg);
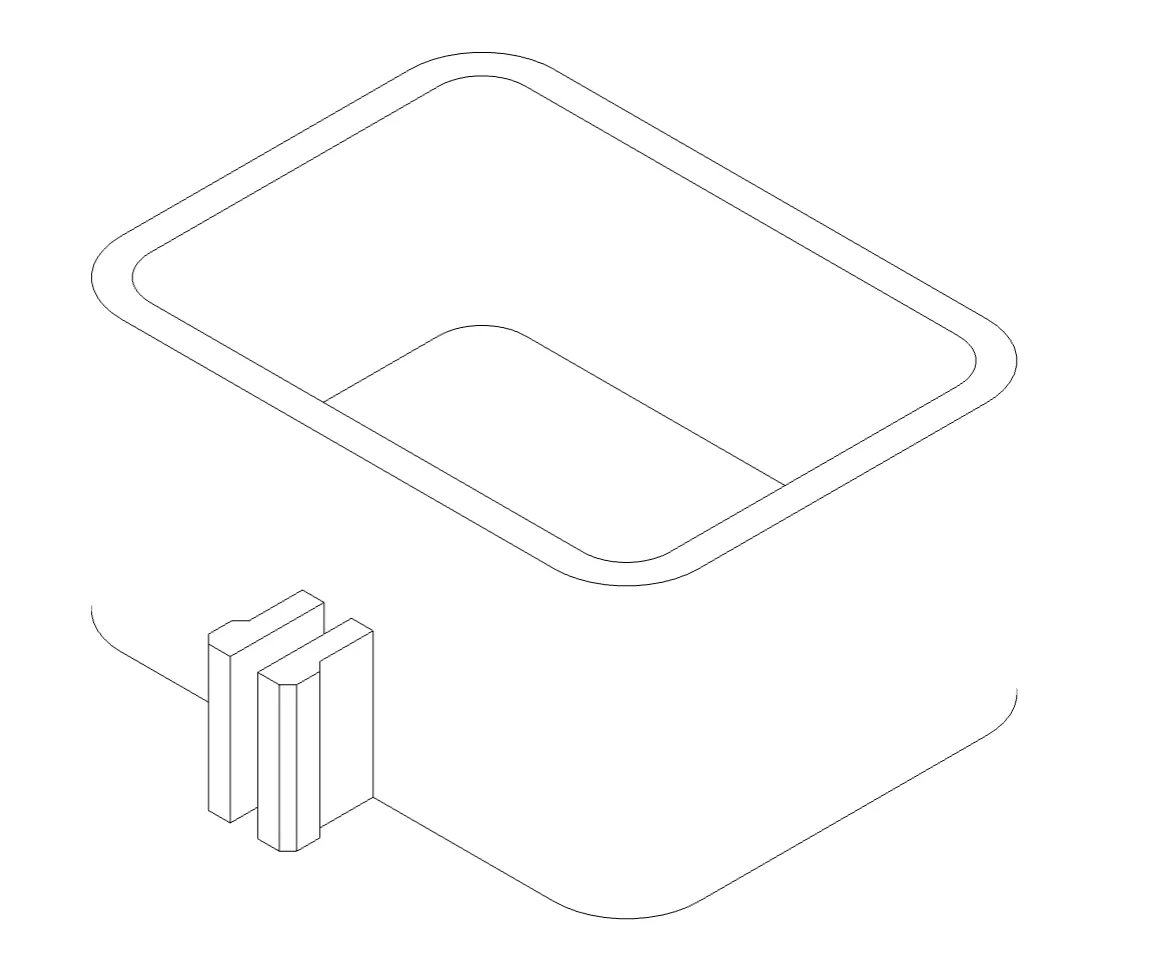
}The part (with clips) can be exported as a list of vertices, but they still need to be rendered. For this I decided to go with the venerable Three.js library.
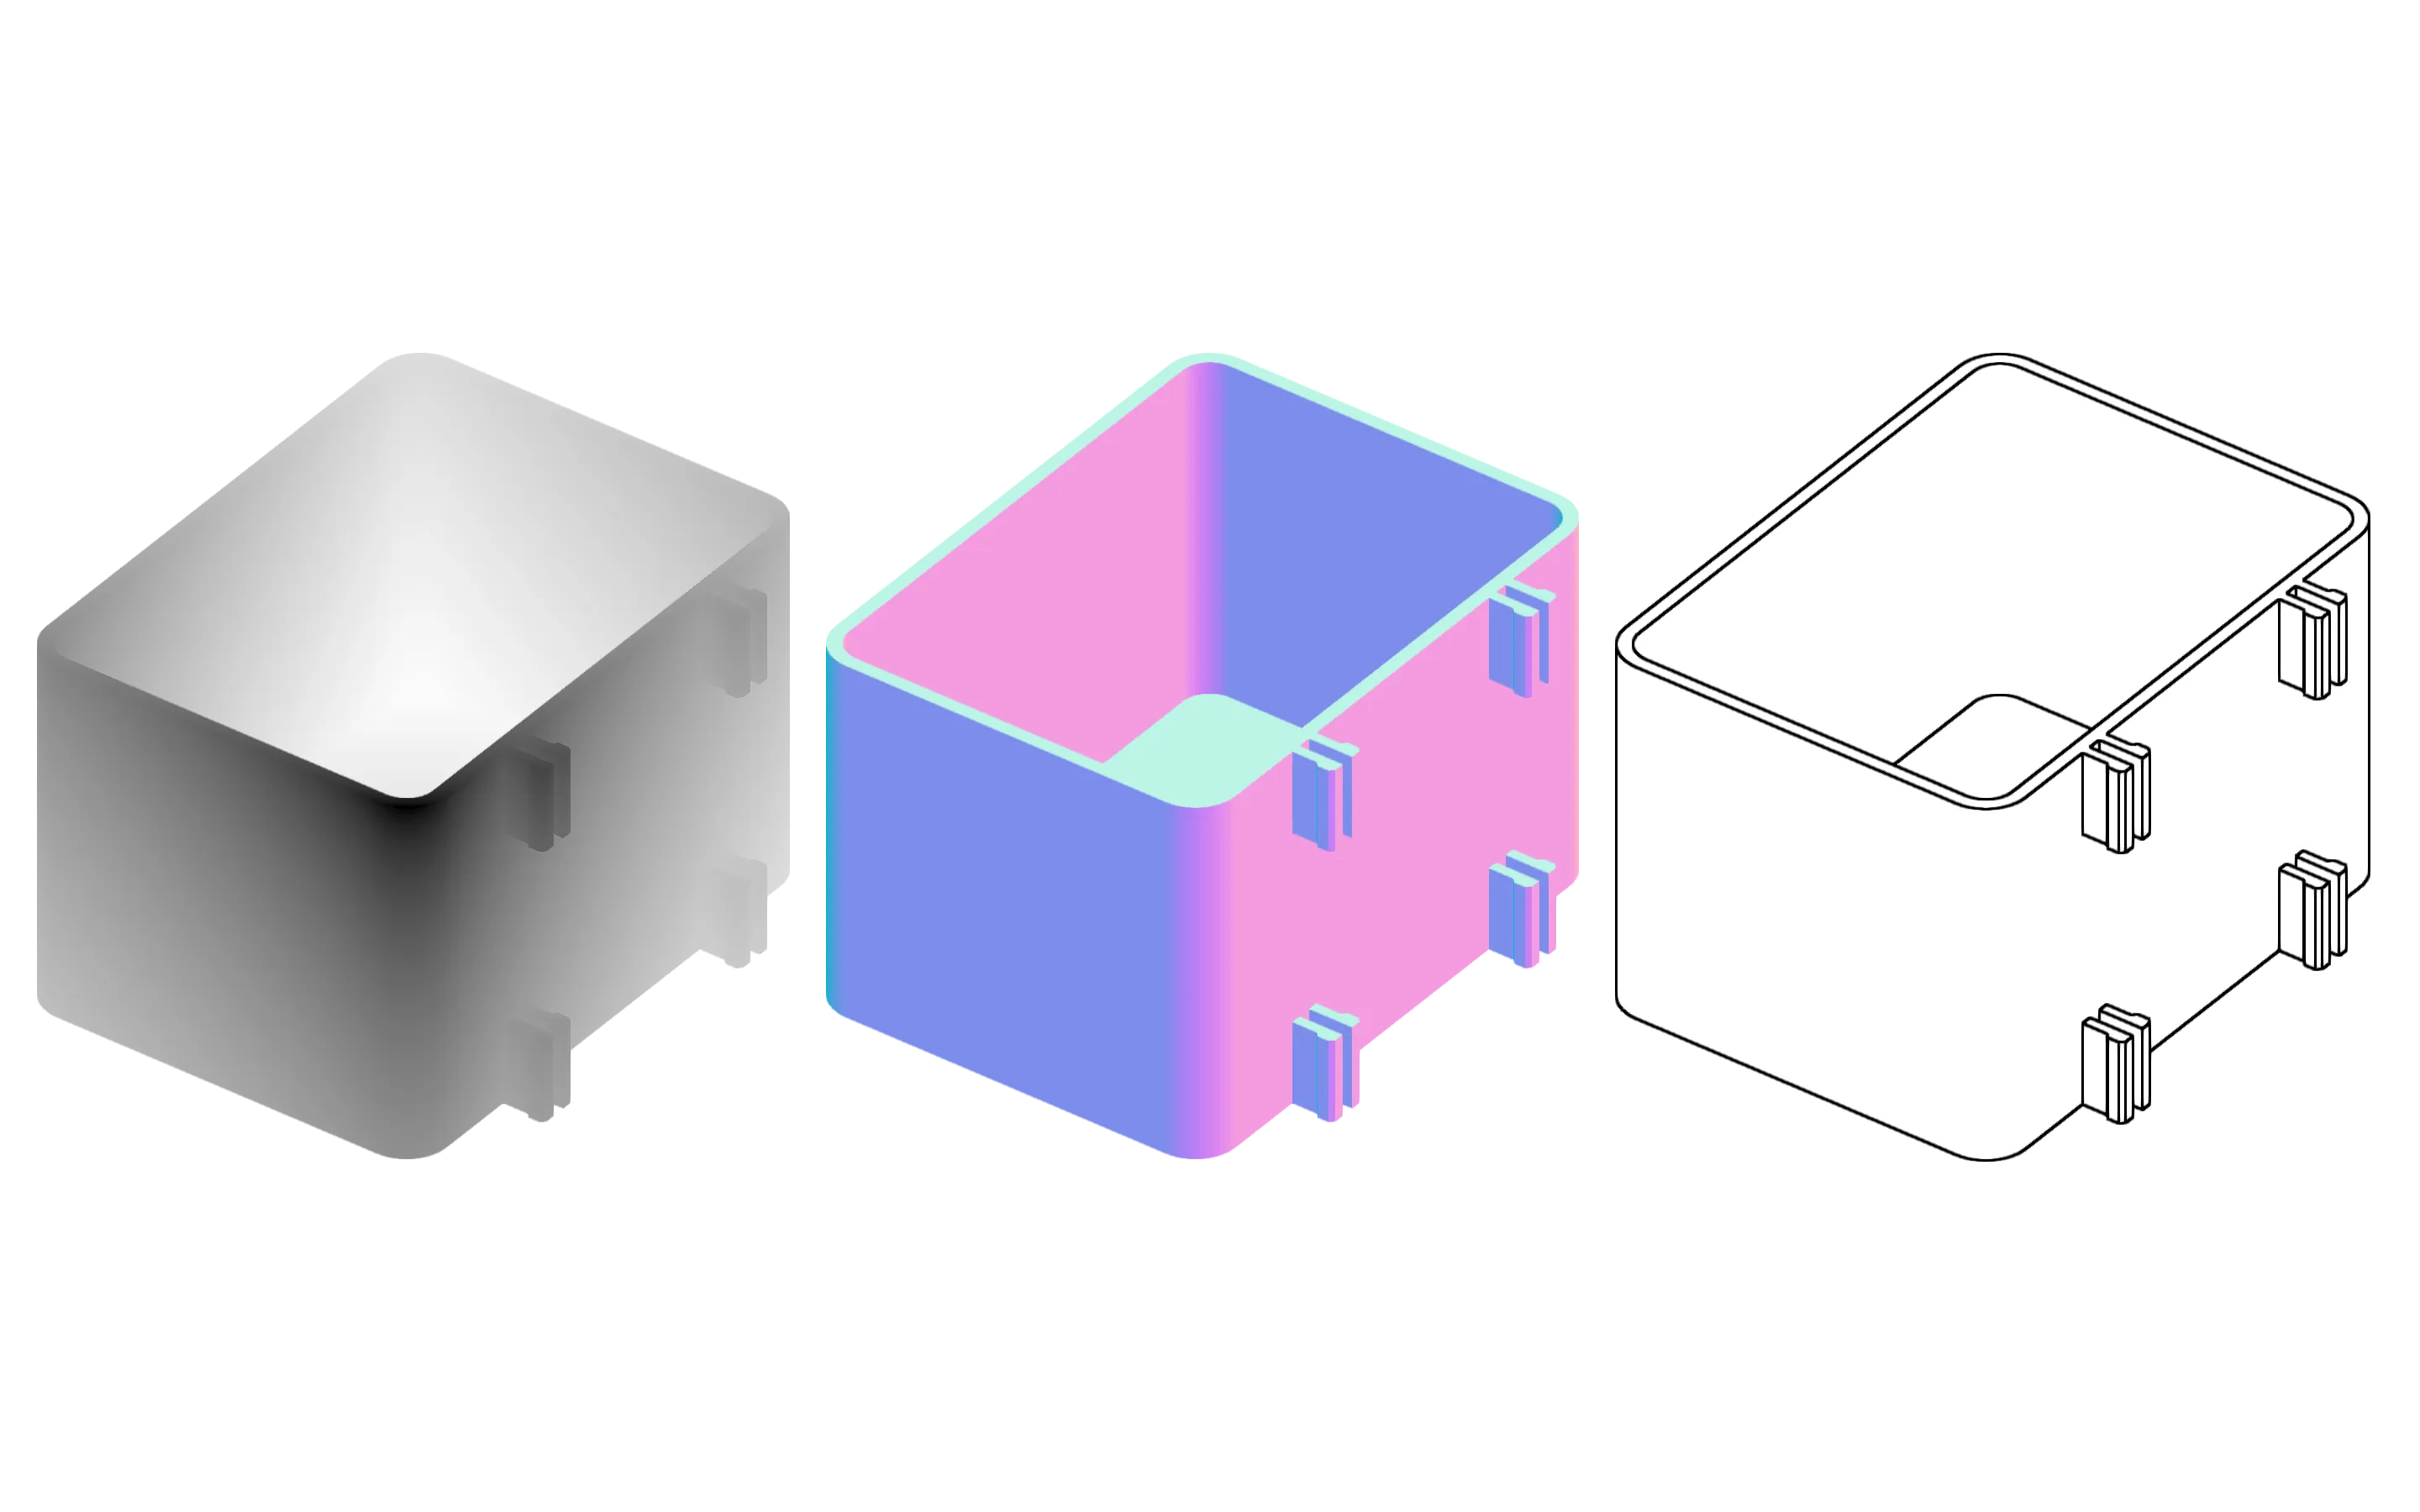
Unfortunately Three.js' "outline" material didn't allow me to render the part exactly as I wanted; in particular it gave me no control over the thickness of the outline and did not actually add outlines everywhere.
The model rendered with Three.js' "outline material", the EdgesGeometry with a LineMaterial.
Three.js does have pretty nice support for post-processing through its EffectComposer. I followed this great article by Roystan (originally written for Unity) explaining how to use edge detection on a 3D model to display outlines (it's super well written with lots of cool examples).
My implementation uses two different passes, each implemented as a WebGL shader.
WebGL shaders are programs that the browser runs on the GPU. They are generally used for graphics [...]. For more information I recommend https://webglfundamentals.org/ and the MDN WebGL tutorial.
From How to Set WebGL Shader Colors with CSS and JavaScript.
The first pass implements the edge detection algorithm explained in the article linked above. The edge detection is done by casting a ray for every pixel and figuring out where it lands on the model. It then calculates the depth of that point on the model (i.e. the distance between the camera & the point on the model) and the normal of the model at that point (i.e. the face's orientation). The resulting depth and normal are then compared to the depth and normal of other pixels close by. If they differ too much from one pixel to the next, then an outline should be shown there and the pixel is given the color "black". This would create a ~1 pixel outline.
The second pass goes through every pixel on screen again and checks if said pixel is within some distance (say, 5 pixels) of a black (outline) pixel from the first pass. If so, this new pixel is also marked as "outline" and rendered black. This effectively thickens the outline, and is implemented as a second pass for performance reasons.
Here's an animation of the depth & normals (I seem to have misplaced the original video):
what goes into edge detection: 1. depth 2. normals 3. depth edges & normal edges 4. thickening #3D #3dgraphics #ThreeJS #webgl
— Nicolas Mattia (@nmattia.bsky.social) 7 March 2025 at 22:57
[image or embed]
That's it for the tech used; bit of manifold-3d, a dab of Three.js and some shading goodness!
What's next for Skapa
It's been really fun to build and I've learned a ton. I didn't understand how GPUs worked and hadn't used graphics APIs in years, and I'll say this: GPUs are crazy powerful (even on a smartphone and a 5 year-old MacBook Air) and graphics APIs have become fun to use (see also my other article on How to Set WebGL Shader Colors with CSS and JavaScript). I find that what's happening when using WebGL is much more transparent than OpenGL 15 years ago, which makes it a bit slower to get started but more rewarding & sustainable in the long run. Maybe I also just have more experience than 15 years ago...
The Skapa project is not complete however and I'll probably keep working on it every now and then. I'm happy with the UI and the rendering, but there are a couple of things I still want to improve.
For instance, I'd love to have more models, either for other IKEA products or potentially beyond IKEA. I have a couple of parts in mind but I need to figure out what the app will then look like: Will it be a single page still, with a dropdown to select the part? Or multi page app where each part gets its own page? Should it still be IKEA-themed if it's not just for IKEA?
Some models on Printables I'd like to port to Skapa
I'd also like to add more controls to tweak the generated model's bottom and wall thickness; all of this is already implemented in the code and previous versions of Skapa did allow to tweak those settings, but I haven't found a nice way to present them.
Finally, there are some 3D printing-specific things that could be improved in the current model. One of them is that the generated model requires supports under the clips (most 3D printers, if not all, can't print in thin air and need something to print on, and 3D printing experts on the internet will reach for the pitchforks when "supports" are mentioned). I have some ideas on how to solve this but changes take more time to implement in code than e.g. in WYSIWYG CAD software.
NoteUpdate: The parts can now be printed without supports!
Again, code on GitHub, and printing instructions on Printables.
Let me know or join the discussion if you enjoyed this article! You can also subscribe to receive updates.
Here's more on the topic of JavaScript and WebGL: